Growing houseplants from seeds is an affordable and rewarding way to fill your home with greenery. Whether you want decorative foliage, colorful flowers, or unusual tropical plants, starting with seeds gives you the opportunity to explore varieties that may be difficult to find as mature plants. However, not every houseplant grows easily from seed, and success depends on choosing suitable varieties, providing enough light, maintaining consistent moisture, and creating the right temperature conditions.
This guide to indoor house plant seeds explains how to choose the best seeds, start them indoors, care for seedlings, avoid common mistakes, and grow healthy houseplants from germination to maturity.
What Are Indoor House Plant Seeds?
Indoor house plant seeds are seeds of plants that can grow successfully inside a home when their environmental requirements are met. They may come from tropical foliage plants, flowering houseplants, succulents, palms, or compact decorative plants.
Unlike buying an established houseplant, growing from seed allows you to observe every stage of development, from the first root to the appearance of mature leaves. It can also be economical when you want to grow several plants at once.
However, seed-grown houseplants usually require more patience than nursery-grown plants. Some varieties germinate within a week or two, while others may take several weeks or longer. Certain tropical species also need specific temperatures, light conditions, or pretreatment before their seeds will sprout.
The most important first step is choosing a plant that matches your indoor environment and experience level. A fast-germinating foliage plant is generally a better starting point for beginners than a slow-growing palm or a species with specialized germination requirements.
Best Indoor House Plant Seeds for Beginners
Some houseplants are much easier to grow from seed than others. For the best results, choose varieties with reliable germination, manageable growth habits, and care requirements that suit your home.
1. Coleus
Coleus is an excellent choice if you want colorful foliage. Its leaves can display combinations of green, pink, red, purple, and cream. Sow the tiny seeds on the surface of moist seed-starting mix because many coleus varieties need light to germinate. Provide bright, indirect light after the seedlings emerge.
2. Spider Plant
Spider plants are popular for their arching, striped leaves. They are most commonly propagated from plantlets rather than seeds, but seed-grown plants are possible when viable seeds are available. For beginners, established spider plant plantlets are usually a faster and more predictable option.
3. Ornamental Peppers
Compact ornamental pepper varieties produce attractive foliage and colorful fruits. They need warmth, strong light, and consistent moisture during early growth. A sunny window or grow light helps prevent weak, stretched seedlings.
4. Polka Dot Plant
The polka dot plant (Hypoestes phyllostachya) is grown for its spotted pink, red, or white foliage. It can be grown from seed and suits warm indoor spaces with bright, filtered light. Pinching the growing tips later can encourage a fuller shape.
5. Tropical Hibiscus
Hibiscus can be grown from seed, although germination may be slower or less predictable than with easy foliage plants. Seed-grown plants can differ from their parent varieties and may take considerable time to flower. They need warmth, abundant light, and space as they mature.
6. Desert Rose
Desert rose (Adenium obesum) is a striking succulent with a swollen stem and potential for colorful flowers. Fresh seeds can germinate under warm conditions, but seedlings require excellent drainage and careful watering. It is better suited to growers who can provide strong light and avoid persistently wet soil. Its sap is toxic if ingested.
Buying tip: Check the botanical name, sowing instructions, seed freshness, and expected mature size before purchasing. Common names can refer to different plants, so the scientific name helps you identify the correct growing requirements.
Where to Buy Indoor House Plant Seeds
You can find houseplant seeds through specialist seed suppliers, online gardening stores, local nurseries, and reputable sellers of tropical or ornamental plants.
Before ordering, consider the following:
- Seed freshness: Look for a packing date, harvest date, or stated viability period where available.
- Botanical identification: Confirm the scientific name and variety rather than relying only on attractive photographs.
- Germination instructions: Reliable sellers provide sowing depth, temperature preferences, and other useful details.
- Storage and packaging: Seeds should be packaged appropriately for the species and protected from excessive heat and moisture.
- Seller reputation: Read reviews carefully and look for clear product descriptions and reasonable return or replacement policies.
- Import requirements: If ordering internationally, check your country’s current rules for importing seeds and plant material. Some species require permits or phytosanitary documentation.
Avoid choosing a seed packet solely because it promises rare colors, unusually fast growth, or dramatic mature plants. Images may show mature specimens that look very different from young seedlings.
Essential Supplies for Starting Houseplant Seeds Indoors
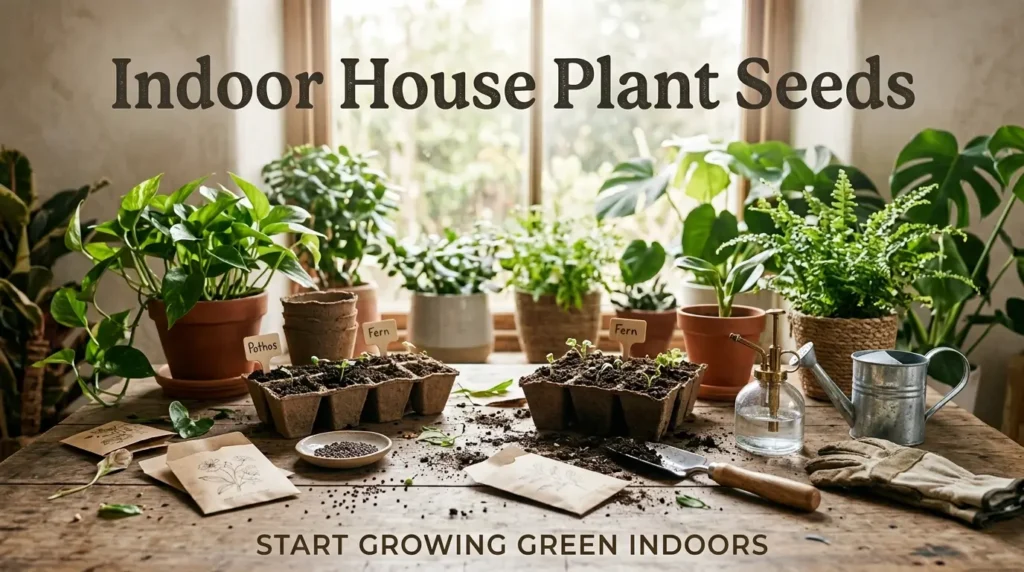
You do not need an elaborate indoor greenhouse to begin. A small collection of clean containers and basic growing supplies is usually enough.
| Supply | Purpose | What to choose |
|---|---|---|
| Seed-starting containers | Hold seeds and young roots | Small pots or trays with drainage holes |
| Seed-starting mix | Supports germination and root development | Fine-textured, clean, well-draining mix |
| Spray bottle or watering can | Moistens the growing medium | Gentle flow that will not displace seeds |
| Clear humidity cover | Slows moisture loss | A ventilated dome or loose transparent cover |
| Grow light | Supplies consistent light | Adjustable light suitable for seedlings |
| Plant labels | Identify varieties | Waterproof labels or a permanent marker |
| Small pots | Accommodate growing roots | Containers with drainage holes for transplanting |
Wash reused containers thoroughly before sowing. This reduces the chance of carrying over plant diseases, algae, or other unwanted material.
A heat mat can help when a species needs warm, consistent germination temperatures, but it is not essential for every plant. Use one only when needed, and follow the manufacturer’s instructions to prevent overheating the growing medium.
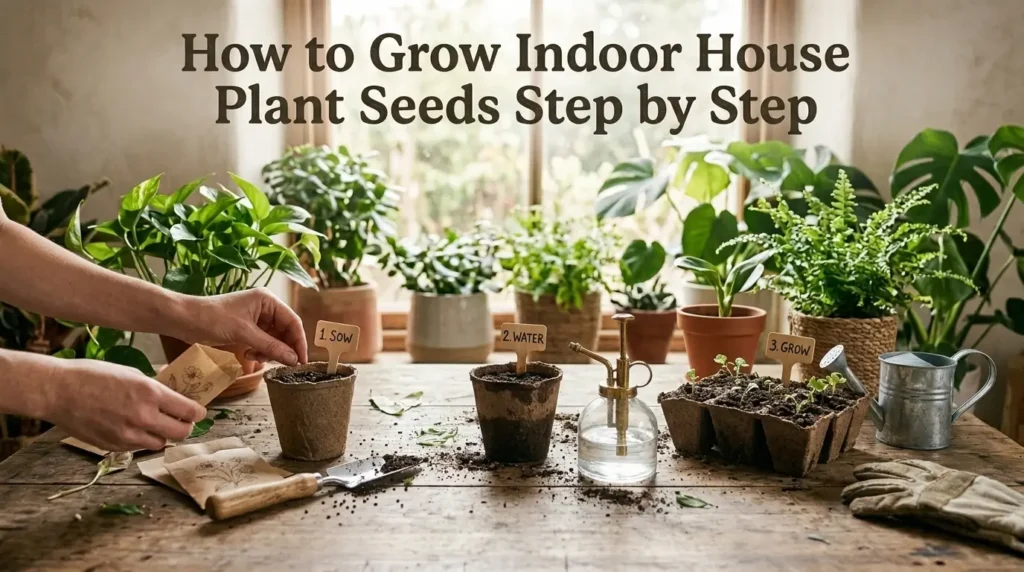
How to Grow Indoor House Plant Seeds Step by Step
Starting seeds successfully is mainly about controlling moisture, temperature, light, and airflow. Follow these steps, adapting the details to the plant species.
Step 1: Read the Seed Packet
Check whether the seeds need light or darkness to germinate, how deeply they should be sown, and what temperature range they prefer.
Small seeds are often sown on the surface or covered with only a very thin layer of mix. Larger seeds may need to be planted deeper. Some seeds have hard coats or specific pretreatment requirements, so avoid using one sowing method for every variety.
If the packet recommends soaking, scarification, or another pretreatment, follow those instructions rather than experimenting with all methods at once. It also helps to write the expected germination time on your plant label, so you know when to stop waiting and sow a fresh batch instead. Keeping the empty packet is worthwhile too, since it holds the variety name and sowing details you may want to check again weeks later.
Step 2: Prepare a Suitable Growing Medium
Use a clean seed-starting mix that retains some moisture while allowing excess water to drain. A fine, airy medium helps small roots develop without becoming trapped in dense, saturated soil.
Ordinary garden soil is usually unsuitable for indoor seed starting because it can compact in small containers and may introduce weeds or disease organisms.
Moisten the mix before filling your containers. It should feel evenly damp, not muddy or dripping wet.
Step 3: Sow the Seeds Correctly
Fill the containers with pre-moistened mix, leaving a little space at the top.
- Place the seeds according to the packet instructions.
- Cover them lightly if the species requires covering.
- Press the medium gently to establish contact between seeds and soil.
- Mist carefully or water from below to avoid washing seeds away.
- Label each container with the plant name and sowing date.
Avoid overcrowding. Giving seedlings enough space improves airflow and makes it easier to remove weaker plants if necessary.
Step 4: Maintain the Right Temperature
Many common tropical houseplant seeds germinate best in warm conditions, but the ideal temperature varies by species. Cool conditions can slow germination, while excessive heat can damage seeds or dry out the growing medium.
Keep seed trays away from cold drafts, air-conditioning vents, and direct contact with hot radiators. If you use a heat mat, monitor the temperature of the growing medium rather than assuming the room temperature is sufficient. A simple thermometer placed at tray level shows what the seeds actually experience, since the growing medium can be cooler or warmer than the room air. When using a heat mat, position it under only part of the tray so seedlings can be moved off the warmth once they emerge, and reduce the heat if the mix ever feels more than slightly warm to the touch.
Step 5: Manage Moisture and Humidity
Seeds need moisture to begin germinating, but they also need oxygen. Waterlogged soil deprives roots of oxygen and encourages fungal problems.
To maintain the right balance:
- Check the surface and moisture level of the growing medium regularly.
- Water gently when the mix begins to dry, following the species’ requirements.
- Use a clear humidity cover when useful, but provide ventilation.
- Remove or open the cover gradually once seedlings emerge.
- Empty standing water from trays after bottom-watering.
Do not leave seedlings permanently sealed in a humid container. Stagnant air and excessive moisture can encourage damping-off, a disease that causes young seedlings to collapse near the soil surface.
Step 6: Provide Adequate Light
Once seedlings emerge, give them enough light to develop compact stems and healthy leaves. A bright window may be sufficient for some plants, but light levels can drop sharply away from the glass.
A grow light offers more consistent conditions, especially during darker seasons or in rooms with limited natural light.
Position the light according to its instructions and adjust the height as plants grow. There is no single correct distance or daily duration for every lamp and plant. Watch the seedlings for signs of stress:
- Long, thin stems: Often indicate insufficient light.
- Pale or bleached leaves: May indicate excessive light, heat, or nutrient issues.
- Dry, curled leaf edges: Can result from excessive heat, low humidity, or inconsistent watering.
Step 7: Thin and Transplant the Seedlings
If several seeds germinate close together, thin them when practical so the remaining seedlings have enough space. Remove weaker seedlings carefully instead of pulling them in a way that disturbs neighboring roots.
Transplant when the seedlings are sturdy enough to handle and have developed true leaves—the leaves that appear after the initial seed leaves. Use small pots with drainage holes and a suitable potting mix for the species.
Hold seedlings by their leaves where possible rather than squeezing delicate stems. Water after transplanting to settle the medium around the roots, then provide appropriate light while the plants recover.
Step 8: Begin Feeding at the Right Time
Seeds contain stored nutrients that support the earliest stage of growth. As seedlings develop, they eventually need additional nutrients, especially if they are growing in a low-nutrient seed-starting mix.
Wait until the seedlings are established and follow the product label for dilution and application frequency. A suitable, diluted fertilizer is generally safer than applying a strong dose to tiny plants.
Overfeeding can damage tender roots and cause fertilizer salts to accumulate. More fertilizer does not necessarily mean faster or healthier growth.
Best Soil Mix for Indoor House Plant Seeds
The growing medium has a major influence on germination and early root health. Most houseplant seeds benefit from a medium that is clean, moisture-retentive, and airy.
A basic seed-starting mix may contain:
- Coco coir or peat moss: Helps retain moisture around developing seeds.
- Perlite or another suitable aeration material: Improves air movement and drainage.
- Fine-textured components: Help small seeds maintain contact with the growing medium.
A commercial seed-starting mix is often the easiest option for beginners. Choose one that is appropriate for seed starting rather than a heavy potting soil intended for mature plants.
Not every species needs the same medium. Desert rose and other plants adapted to drier conditions require different moisture management from tropical foliage plants. Once seedlings are ready for transplanting, move them into a potting mix suited to their long-term growing needs.
Light Requirements for Seedlings and Young Houseplants
Light affects how seedlings develop after germination. Even if seeds sprout successfully, insufficient light can produce weak growth that struggles to support mature foliage.
Natural Light vs. Grow Lights
| Feature | Natural window light | LED grow light |
|---|---|---|
| Availability | Depends on window direction, weather, and season | Available whenever needed |
| Coverage | Can vary across a windowsill | Can be directed toward a defined growing area |
| Adjustment | Depends on window placement | Height and schedule can often be adjusted |
| Best use | Small collections near suitable windows | Seed trays, multiple seedlings, and darker rooms |
A bright east-facing window can work well for many seedlings, while a south-facing window in the Northern Hemisphere may provide stronger light. However, window direction alone does not guarantee suitable conditions because buildings, curtains, glazing, and seasonal changes affect light intensity.
For artificial lighting, follow the manufacturer’s recommended distance and schedule. Many seedlings benefit from approximately 12–16 hours of light per day, depending on species and light intensity, with a period of darkness each day. Avoid assuming that a longer lighting period will compensate for a lamp that is too weak.
Rotate containers periodically when light comes mainly from one direction. This helps prevent seedlings from leaning excessively toward the window.
Watering Indoor House Plant Seeds Correctly
Water management is one of the most important parts of seed starting. Seeds can fail to germinate if they dry out, while newly emerged seedlings can rot when the medium stays saturated.
Instead of following a fixed watering calendar, check the growing medium regularly.
- Before germination, keep the medium consistently moist according to the seed’s needs.
- After emergence, allow the surface to dry slightly when appropriate, without letting delicate roots dry out.
- Use containers with drainage holes.
- Water slowly so that seeds and seedlings are not displaced.
- Avoid leaving pots in standing water for extended periods.
Bottom-watering can be useful for established seedlings because it reduces disturbance at the soil surface. Place the container in a shallow tray of water, allow the medium to absorb moisture, and remove it once adequately moist.
Remember that small pots can dry faster than larger ones, especially under grow lights or in warm rooms. Check them more frequently in these conditions.
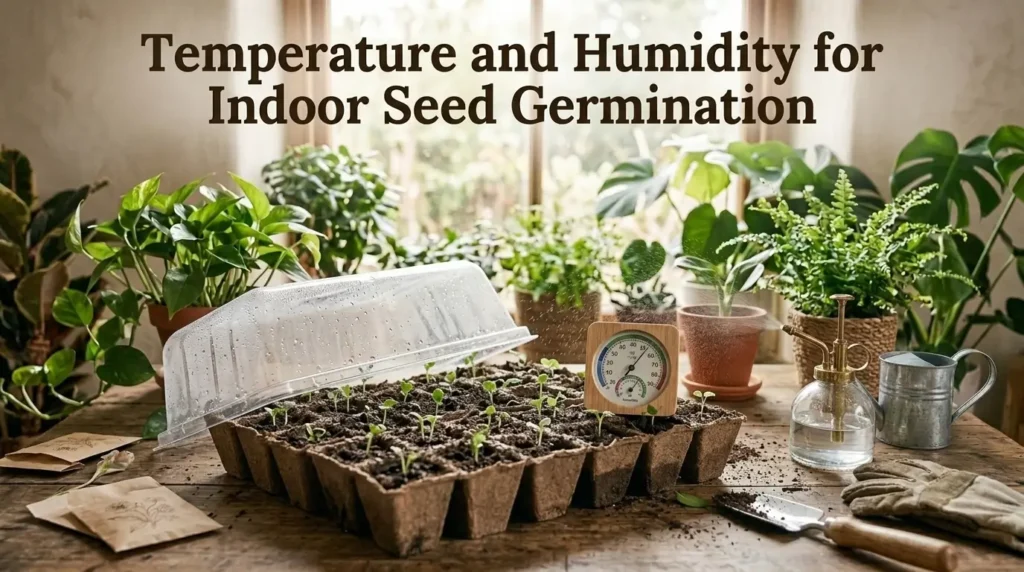
Temperature and Humidity for Indoor Seed Germination
Temperature requirements vary among houseplant species, so the seed packet should guide your setup. Warm-season tropical plants often prefer warm conditions, while some other species germinate better at cooler temperatures or require special temperature changes.
Humidity also matters, but high humidity is not always better. A temporary humidity dome can reduce moisture loss before germination. Once seedlings appear, ventilation becomes increasingly important.
To maintain a stable environment:
- Keep trays away from sudden temperature changes.
- Avoid placing seedlings directly against cold window glass.
- Ventilate covered trays regularly.
- Reduce humidity gradually after germination when the plant can tolerate normal room conditions.
- Monitor the medium rather than spraying automatically several times a day.
A basic room thermometer and regular visual checks are often enough for a small home growing setup.
Common Problems When Growing Houseplants from Seeds
If seeds fail to germinate or seedlings begin to struggle, investigate the growing conditions before adding fertilizer or changing everything at once.
| Problem | Likely cause | What to check and do |
|---|---|---|
| Seeds do not sprout | Old seeds, incorrect temperature, unsuitable sowing depth, or inadequate moisture | Check the seed packet, seed viability, temperature, and medium moisture |
| Seedlings become tall and weak | Insufficient light | Increase suitable light gradually and adjust lamp placement |
| Seedlings collapse at the soil line | Possible damping-off disease | Remove affected seedlings, improve airflow, avoid saturated soil, and clean equipment |
| Leaves turn yellow | Overwatering, poor roots, insufficient light, or nutrient issues | Inspect root health, drainage, light, and watering before fertilizing |
| Surface develops green algae | Persistently wet medium and excessive surface moisture | Reduce unnecessary watering, improve airflow, and allow appropriate surface drying |
| Seedlings stop growing | Root restriction, unsuitable temperature, or environmental stress | Check root space, temperature, moisture, and light |
| Leaves show scorched patches | Excessive light or heat, or other stress | Check lamp distance, window exposure, and temperature |
How to Prevent Mold and Damping-Off
Prevention is more effective than trying to rescue seedlings after widespread collapse.
- Start with clean containers and fresh seed-starting mix.
- Avoid overcrowding seeds.
- Provide drainage and avoid keeping the mix waterlogged.
- Ventilate humidity covers.
- Remove dead plant material promptly.
White fungal growth on the surface is not always harmful, but it often indicates that the medium is staying wet for too long. If seedlings develop dark, constricted stems and collapse, damping-off may be responsible. Remove affected plants and correct the growing conditions before sowing again. A small fan set on low near the trays keeps air moving, which discourages both mold and damping-off without drying the mix too quickly. If fuzzy growth appears on the soil surface, act early by improving airflow and letting the top layer dry slightly between waterings.
When to Repot Seed-Grown Houseplants
Do not rush seedlings into large pots. Small seedlings often establish better in appropriately sized containers because oversized pots can hold excess moisture around their limited root systems.
Repot when roots begin filling the available space, growth becomes restricted, or the seedlings are large enough to handle safely.
Choose a container only modestly larger than the root system and ensure it has drainage holes. Use a mix suitable for the species, water after transplanting, and avoid applying concentrated fertilizer immediately.
After repotting, keep plants in appropriate light and avoid major environmental changes while they recover. Some temporary slowing of growth is normal.
How Long Do Indoor House Plant Seeds Take to Grow?
Germination time and the time required to produce a mature plant are different. Some seeds sprout within several days, while others need weeks or longer. Reaching a decorative size may take months or years, depending on the species and growing conditions.
| Growth stage | What happens | Main priority |
|---|---|---|
| Germination | The seed absorbs water and begins growing | Correct moisture and temperature |
| Early seedling | Roots and initial leaves develop | Gentle watering and suitable light |
| True-leaf stage | The seedling begins producing characteristic leaves | Adequate spacing and careful monitoring |
| Established young plant | Roots and foliage become more developed | Appropriate potting mix and gradual feeding |
| Maturing houseplant | The plant develops its long-term growth habit | Species-specific light, water, and maintenance |
Treat estimated germination times on seed packets as guidelines rather than guarantees. Seed freshness, temperature, storage conditions, and species variation can all affect results.
How to Make Your Indoor Seed-Growing Setup More Sustainable
Growing plants from seed can reduce the need to purchase fully grown plants, but the overall environmental impact depends on your materials and growing practices.
Consider these practical habits:
- Reuse seed trays and pots after cleaning them thoroughly.
- Sow only the number of seeds you can realistically care for.
- Use LED grow lights when artificial lighting is necessary, and switch them off during the plant’s required dark period.
- Avoid unnecessary plastic covers and single-use gardening supplies.
- Choose locally available seeds when suitable varieties are available.
- Reuse potting materials only when appropriate for the plant and free from disease problems.
Growing from seed can also be an enjoyable indoor activity for families and beginners. Watching a seed develop roots and leaves encourages patience and helps new growers understand plant development.
However, do not assume that every houseplant improves indoor air quality enough to replace ventilation or air filtration. Houseplants can make living spaces more attractive, but their practical air-cleaning effects in ordinary homes should not be exaggerated.
Pro Tips for First-Time Seed Starters
These small habits make seed starting more forgiving, especially if this is your first tray:
- Sow a few extra seeds than you need, since not every seed germinates.
- Keep a simple growing journal with sowing dates and what worked, so each tray teaches you something.
- Start with one or two easy varieties before expanding to slower or fussier species.
- Resist the urge to disturb seeds to check progress; lifting them can damage delicate new roots.
- Treat your first tray as practice and sow again if it fails — timing and conditions are easier to judge the second time.
Frequently Asked Questions About Indoor House Plant Seeds
1. What are the easiest indoor house plant seeds to grow?
Coleus and polka dot plant seeds are useful options for beginners who want decorative foliage. Ornamental peppers can also be rewarding if you can provide enough light and warmth. Always check the requirements of the specific variety.
2. Can I grow houseplants from seeds purchased online?
Yes. Purchase from reputable sellers who provide botanical names, seed information, and growing instructions. Check freshness and local import rules before ordering seeds from another country.
3. Do indoor house plant seeds need sunlight to germinate?
Not all seeds require light to germinate. Some germinate better in darkness, while others need light and should be surface-sown. After seedlings emerge, most houseplants require appropriate light for healthy growth.
4. Should I soak houseplant seeds before planting?
Only when recommended for the species. Soaking can help certain seeds absorb water, but it is unnecessary for many small seeds and may cause problems if seeds remain submerged too long.
5. Can I use regular potting soil for starting seeds?
A fine-textured seed-starting mix is usually preferable because it provides suitable moisture retention and aeration. Heavy garden soil or dense potting soil may compact around delicate roots.
6. Why are my indoor plant seeds not germinating?
Common causes include old or damaged seeds, incorrect temperature, unsuitable planting depth, and inconsistent moisture. Review the species’ germination requirements before resowing.
7. How often should I water newly planted houseplant seeds?
There is no universal schedule. Keep the medium appropriately moist for the species, and check it frequently. Avoid both complete drying and persistent waterlogging.
8. Can I grow tropical houseplants from seed in a small apartment?
Yes, provided you can meet their light, temperature, and space requirements. A small shelf with suitable LED grow lights can support several seed trays, although mature plants may eventually need more room.
9. When should I fertilize houseplant seedlings?
Wait until seedlings are established and follow the needs of the species and growing medium. Start cautiously with a suitable diluted fertilizer when necessary, because excessive nutrients can damage young roots.
10. Are seed-grown houseplants identical to the parent plant?
Not always. Plants grown from hybrid or cross-pollinated seeds may differ in leaf color, size, growth habit, or flower characteristics. If you want an exact copy of a particular cultivar, vegetative propagation may be more reliable.
Conclusion
Growing indoor houseplants from seeds is a practical way to expand your plant collection, learn basic horticulture, and enjoy the process of nurturing new growth. Success begins with selecting suitable varieties and following their specific germination requirements.
Use a clean, well-draining seed-starting mix, maintain appropriate moisture and temperature, and provide sufficient light after germination. Monitor seedlings regularly, make adjustments gradually, and be patient as your plants develop. With consistent care and realistic expectations, even a small indoor growing space can become a productive starting point for a beautiful houseplant collection.
You do not need an elaborate indoor greenhouse. A small collection of clean containers and basic supplies is enough: seed-starting containers (small pots or trays with drainage holes), a fine-textured seed-starting mix, a spray bottle or watering can with gentle flow, a clear ventilated humidity cover, an adjustable grow light, plant labels, and small pots for transplanting. Wash reused containers thoroughly before sowing.
Prevention is more effective than trying to rescue seedlings after widespread collapse. Start with clean containers and fresh seed-starting mix. Avoid overcrowding seeds. Provide drainage and avoid keeping the mix waterlogged. Ventilate humidity covers and remove dead plant material promptly. If seedlings collapse at the soil line, remove affected seedlings, improve airflow, avoid saturated soil, and clean equipment.
Do not rush seedlings into large pots. Repot when roots begin filling the available space, growth becomes restricted, or the seedlings outgrow their containers. Choose a container only modestly larger than the root system and ensure it has drainage holes. After repotting, keep plants in appropriate light and avoid major environmental changes while they recover.

Megan Foster is the founder and lead writer of GrowIndoorly.com, where she shares practical, easy-to-follow advice for growing healthy indoor plants. She is passionate about helping beginners and experienced plant lovers build thriving indoor gardens with confidence. Megan writes about houseplants, indoor herbs, succulents, hydroponics, grow lights, plant propagation, watering, soil care, and everyday plant maintenance.
She enjoys researching trusted gardening techniques and transforming them into simple, actionable guides that readers can easily apply at home. Her goal is to make indoor gardening more enjoyable and accessible by providing clear, reliable information that helps people keep their plants healthy throughout the year. Whether you’re caring for your first houseplant or expanding your indoor plant collection, Megan’s practical tips are designed to help you grow with confidence.