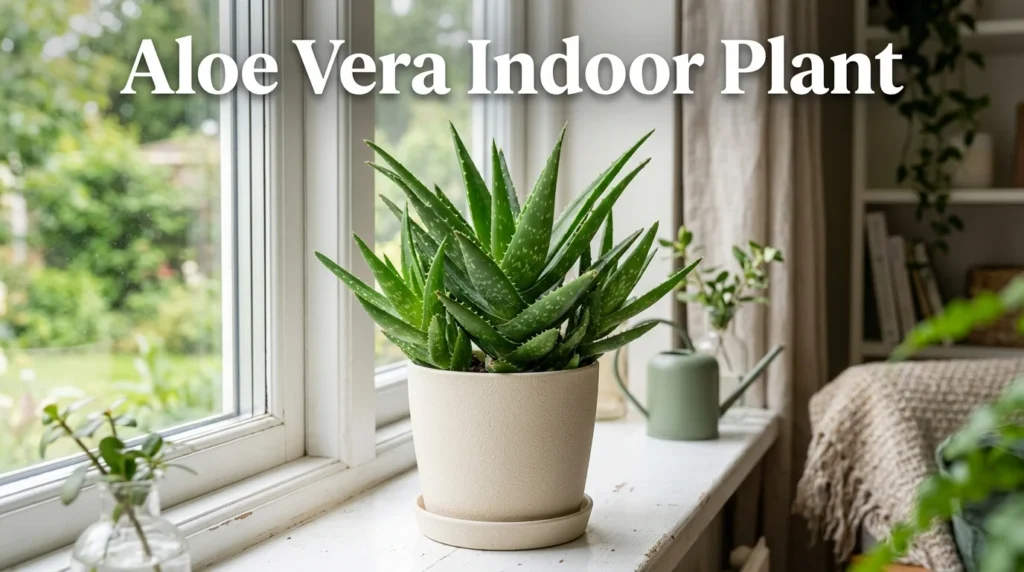
Aloe vera (Aloe barbadensis Miller) is one of the most resilient, useful, and popular indoor succulents you can keep in your home. Native to arid, sunny regions of the Arabian Peninsula, this thick-leaved plant stores water inside its gel-filled foliage, enabling it to survive weeks without a drop of rain.
However, bringing an aloe vera plant indoors creates a environmental challenge. Interior spaces typically provide lower light levels, higher relative humidity, and less airflow than the plant’s natural habitat. When indoor aloe plants fail, the primary cause is almost always excess water combined with insufficient light or dense potting soil.
This comprehensive guide covers everything you need to keep your indoor aloe thriving: ideal light placement, fast-draining potting substrates, the soak-and-dry watering routine, harvesting offshoots (pups), and step-by-step diagnostic fixes for common leaf problems.
Quick Reference: Indoor Aloe Care Profile
| Environment Variable | Ideal Indoor Target Range | Critical Danger Zone |
| Light | 4–6 hours bright, indirect light daily (or direct morning sun) | Deep shade (<200 foot-candles) |
| Watering Method | Soak-and-dry (allow soil to dry out 100% between waterings) | Wet soil for >5 consecutive days |
| Potting Substrate | 50% inorganic grit (perlite/pumice) + 50% cactus compost | Standard peat-based potting soil |
| Container Material | Unglazed terracotta with functional drainage hole | Plastic/ceramic without drainage holes |
| Temperature | 55°F to 80°F (13°C to 27°C) | Frost / Temperatures below 40°F (4°C) |
| Fertilization | Balanced succulent fertilizer 1–2 times during spring/summer | High-nitrogen fertilizer in winter |
1. Finding the Ideal Indoor Light Placement
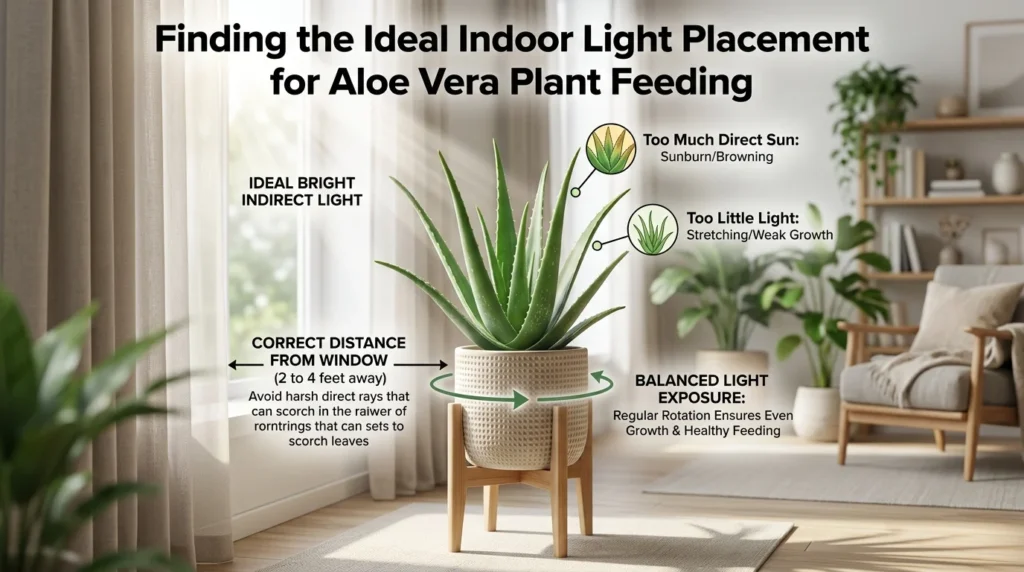
Aloe vera requires bright light to maintain its upright posture, thick leaves, and vibrant green color. Indoors, finding the correct balance between light intensity and heat is key.
Window Orientations Breakdown
- South-Facing Windows: The absolute best placement in Northern Hemisphere homes. South-facing windows deliver strong, consistent sunlight throughout the day.
- West-Facing Windows: Excellent secondary option. Provides intense afternoon light. If intense summer heat through glass causes leaves to turn reddish-brown, move the pot 12 to 18 inches back from the glass.
- East-Facing Windows: Ideal for gentle, direct morning light followed by bright indirect sunlight in the afternoon. Prevents sun scorch while providing adequate energy.
- North-Facing Windows: Generally insufficient on their own. Aloe plants kept in north windows usually stretch out, develop thin, drooping leaves, and lose their compact rosette shape.
Spotting Light Stress
- Too Little Light (Etiolation): Leaves pale to light green or yellow, flatten out, lean heavily toward the window, and become soft or leggy.
- Too Much Direct Light (Sun Stress): Leaves change from rich green to bronze, reddish-brown, or greyish-brown. This is a protective pigment change (anthocyanin reaction) caused by sudden high-intensity sunlight or intense thermal heat through glass.
Pro Tip: When moving an aloe plant from a low-light area to a bright window, acclimate it over 10 to 14 days by increasing bright light exposure by 30 minutes each day to avoid sunburn.
2. Soil Mix and Pot Selection
Root health determines top growth health in succulents. Standard indoor potting mixes retain far too much water for an aloe vera’s shallow, fibrous root system.
Building a Fast-Draining Aloe Soil Mix
Aloe vera roots need aeration and rapid drainage. Commercial cactus and succulent mixes work well, but custom mixes provide better root zone aeration.
- D.I.Y. Standard Blend: Combine 1 part commercial succulent soil with 1 part coarse perlite or pumice.
- Advanced Gritty Blend:
- 40% Coarse Perlite or Pumice (aeration and drainage)
- 40% Commercial Cactus Potting Mix (organic base)
- 20% Coarse Builders Sand or Lava Rock (weight and physical structure)
Selecting the Right Pot
Always prioritize unglazed terracotta pots over plastic or glazed ceramic options. Terracotta is porous, allowing moisture to evaporate through the pot walls as well as top and bottom drainage holes.
- Drainage is Mandatory: Never plant an aloe in a container without a functional bottom drainage hole.
- Sizing: Choose a pot that is only 1 to 2 inches broader than the root ball. Oversized pots hold extra soil mass that remains wet too long, increasing root rot risk.
3. The “Soak-and-Dry” Water Routine
Overwatering kills more indoor aloe plants than all pests and diseases combined. Aloe leaves store vast reserves of water; the plant thrives when allowed to dry out completely between waterings.
1.Check Soil Dryness Deeply:Confirm 100% dry soil before watering.
Insert a wooden skewer or moisture meter into the bottom third of the pot. Do not water if you detect any dampness or clinging soil particles. The top 3 to 4 inches must be completely dry.
2.Soak Thoroughly Until Draining:Provide a deep, saturated soak.
Pour water evenly over the soil surface around the base until liquid streams freely from the bottom drainage hole. Avoid splashing water directly into the center leaf rosette.
3.Empty Standing Water Tray:Never allow roots to sit in water.
Allow the pot to drain fully for 15 to 20 minutes. Empty any accumulated water out of the drainage saucer immediately.
4.Drying Period:Adjust frequency by season.
Allow the pot to dry out fully. In spring and summer, watering may occur every 2 to 3 weeks. In autumn and winter, stretch watering intervals to every 4 to 8 weeks.
4. Seasonal Care, Temperature & Feeding
Temperature and Humidity
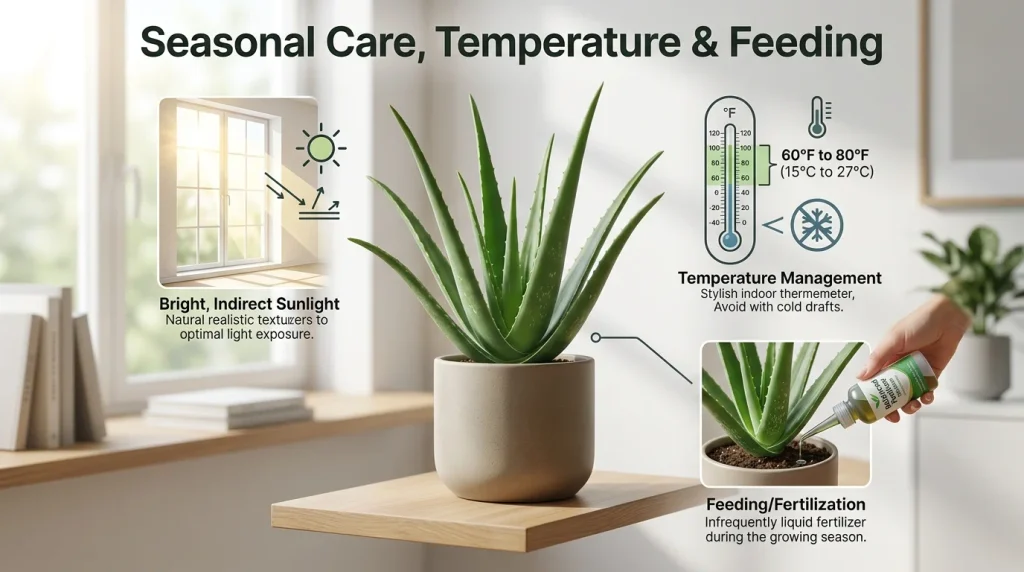
- Ideal Range: Maintain indoor temperatures between 55°F and 80°F (13°C to 27°C).
- Cold Vulnerability: Aloe vera foliage consists mostly of water. Temperatures below 40°F (4°C) damage cellular tissue, turning leaves to black mush. Keep plants away from cold drafts or glass panes during winter.
- Humidity: Average household humidity (30%–50%) is ideal. Avoid placing aloe vera in high-humidity spaces like windowless bathrooms.
Feeding Requirements
Aloe plants are low-maintenance feeders. Excess fertilizer leads to weak, elongated leaf growth and salt burn on root tips.
- Schedule: Feed 1 to 2 times maximum during active spring and summer growth. Do not fertilize during autumn or winter dormancy.
- Formula: Use a balanced succulent/cactus liquid fertilizer (such as a 2-7-7 or 5-10-10 formula) diluted to half or quarter strength. Always apply fertilizer to damp soil to protect tender roots.
5. Propagation: How to Separate and Pot Aloe Pups
As an aloe vera matures, it produces small offshoots around its base known as “pups” or offsets. Removing these pups maintains the main plant’s vigor and provides free new plants.
+-------------------------------------------------------------------+
|                  ALOE PUP SEPARATION TIMELINE                     |
|                                                                   |
| [ Wait for Size ]    [ Unpot & Separate ]    [ Callus & Repot ]   |
|   Pup reaches          Expose connection       Allow cut root     |
|   1/5th to 1/3rd       and slice close to      to dry for 48 hrs  |
|   parent size          main stem rootstock     before planting    |
+-------------------------------------------------------------------+
1.Identify Suitable Offshoots:Check size and root independence.
Allow pups to reach at least 3 to 4 inches tall (roughly one-fifth to one-third the size of the parent plant) and develop their own small green leaves before removal.
2.Unpot and Uncover Root Systems:Gentle soil removal.
Slide the mother plant out of its pot. Brush away loose soil to inspect the connection point between the parent stem and the offshoot base.
3.Slice the Connecting Stem:Use a sterile blade.
Using a clean, sharp knife or shears, cut the offset away from the mother plant as close to the main stem as possible, preserving any small root strands attached to the pup.
4.Callus Cut Surfaces:Air-dry to prevent rot infections.
Set the separated pup in a warm, shaded area for 24 to 48 hours. This allows the cut stem surface to form a tough callus, preventing soil pathogens from invading the tissue.
5.Plant in Dry Gritty Mix:Delay initial watering.
Pot the pup in a small terracotta pot filled with dry gritty succulent mix. Wait 5 to 7 days before its first light watering to allow root acclimation.
6. Indoor Aloe Troubleshooting Guide
| Problem Observed | Primary Root Cause | Secondary Check Points | Corrective Action |
| Soft, Mushy, Translucent Leaves | Overwatering / Root Rot | Soggy soil, sour smell from drainage holes | Unpot plant, trim mushy black roots, air-dry overnight, repot in fresh dry mix. |
| Thin, Curled, Concave Leaves | Underwatering / Dehydration | Soil pulled away from pot edge | Provide a thorough soak-and-dry watering. Leaves will plump back up over 48 hours. |
| Bending or Drooping Leaves | Insufficient Light / Heavy Soil | Soft stem base, pale green leaves | Relocate to a brighter sunny window; ensure pot has adequate drainage. |
| Brown, Sunburnt Leaf Tips | Excessive direct heat / Chemical burn | Low air humidity, tap water fluoride | Move slightly back from hot window glass; use distilled or rain water if tap water is hard. |
| Reddish-Bronze Leaf Color | High Light / Temperature Stress | Sudden location change | This is a normal protective stress response; move to bright indirect light if growth slows. |
Conclusion
Cultivating a vibrant aloe vera plant indoors comes down to respecting its natural arid origins. By prioritizing bright sunlight, potting in a high-porosity gritty soil blend, and strictly adhering to a soak-and-dry watering schedule, you eliminate the most common pitfalls of indoor succulent care.
Beyond its striking geometric aesthetic, a thriving aloe plant rewards your efforts with a continuous supply of baby offshoots to propagate and share. Pay close attention to subtle cues from your plant’s foliage, adjust your care routine with the changing seasons, and your indoor aloe vera will remain a healthy, dramatic centerpiece for years to come.
Knowledge Check Quizzes
Q1: What is the single most common cause of aloe vera plant death indoors?
A) Underwatered soil
B) Excess water and root rot
C) Too much sunlight
D) Low fertilizer levels
Q2: Which container material is best suited for growing aloe vera indoors?
A) Glazed ceramic
B) Plastic
C) Unglazed terracotta
D) Glass terrarium
Q3: How much of the soil mix should dry out before watering an indoor aloe vera?
A) Only the top inch
B) Top 25% of the pot
C) Top 50% of the pot
D) 100% dry from top to bottom
Q4: What causes aloe vera leaves to turn a reddish-bronze shade?
A) Overwatering
B) High light intensity / heat stress
C) Nitrogen deficiency
D) Low humidity
Q5: When separating a pup from a mother plant, what step prevents stem rot?
A) Soaking the pup in water for a week
B) Allowing the cut stem to callus in air for 24-48 hours
C) Applying high-nitrogen fertilizer directly to the cut
D) Burying the entire rosette under moist soil
Horizontal Answer Key
Q1: B | Q2: C | Q3: D | Q4: B | Q5: B
Frequently Asked Questions
1. How often should I water my indoor aloe vera plant?
There is no fixed schedule. Water only when the potting soil has dried out completely from top to bottom. In warm, bright conditions, this is usually every 2 to 3 weeks. During winter dormancy, it can be every 4 to 8 weeks.
2. Why is my indoor aloe plant falling over or turning limp?
Fallen or limp stems usually indicate either lack of light or root rot from overwatering. In low light, stems grow weak and top-heavy. When overwatered, roots rot away, preventing the plant from supporting itself.
3. Can I grow aloe vera in a pot without drainage holes?
No. Aloe vera roots rapidly develop fungal rot if left in standing water. Always use pots with bottom drainage holes, preferably made from unglazed terracotta.
4. Should I cut off brown or dead leaf tips?
Yes. Use clean, sharp shears to trim dead or brown leaf tips at a slight angle. Cut only the dead brown portion—avoid cutting deep into healthy green tissue, which creates a fresh wound.
5. Why are my aloe vera leaves flat instead of plump?
Flat, thin leaves mean the plant is using up its internal water reserves due to prolonged dryness, or it lacks sufficient sunlight to generate food through photosynthesis. Adjust your watering thoroughness and increase light exposure.
6. Can indoor aloe vera plants bloom?
Aloe vera plants rarely bloom indoors because low interior light levels usually don’t provide enough energy to form flower stalks. Outdoor plants produce tall yellow flower spikes in spring under bright sunlight.
7. Is aloe vera toxic to pets?
Yes. Aloe vera contains saponins and anthraquinones, which are mild to moderately toxic to dogs and cats if chewed or ingested, causing lethargy, vomiting, or diarrhea. Keep plants out of reach of curious pets.

Megan Foster is the founder and lead writer of GrowIndoorly.com, where she shares practical, easy-to-follow advice for growing healthy indoor plants. She is passionate about helping beginners and experienced plant lovers build thriving indoor gardens with confidence. Megan writes about houseplants, indoor herbs, succulents, hydroponics, grow lights, plant propagation, watering, soil care, and everyday plant maintenance.
She enjoys researching trusted gardening techniques and transforming them into simple, actionable guides that readers can easily apply at home. Her goal is to make indoor gardening more enjoyable and accessible by providing clear, reliable information that helps people keep their plants healthy throughout the year. Whether you’re caring for your first houseplant or expanding your indoor plant collection, Megan’s practical tips are designed to help you grow with confidence.